Key Differences Between Interior and Exterior Painting by Painters Perrysburg OH Explained in Detail

Painting is an integral part of maintaining and enhancing the aesthetic appeal of any building. However, interior and exterior painting are not interchangeable processes. They require specific types of paints, techniques, and preparations to achieve the desired results. Below is a comprehensive explanation of the key differences between interior and exterior painting.
1. Paint Composition
One of the most critical differences lies in the formulation of the paint itself: – Interior Paint: Designed for controlled environments, interior paints focus on aesthetics, durability, and ease of cleaning. They often contain fewer volatile organic compounds (VOCs) to reduce odor and improve indoor air quality. – Exterior Paint: Formulated to withstand harsh outdoor conditions like UV rays, rain, wind, and fluctuating temperatures. Exterior paints include additives for greater durability such as mildew resistance, fade resistance, and weatherproofing.
| Feature | Interior Paint | Exterior Paint |
| VOC Content | Low | Moderate-to-high |
| Durability | Moderate | High |
| Resistance Properties | Stain-resistant | Weather-, mildew-, UV-resistant |
2. Durability Requirements
- Interior Painting: Since interiors are not exposed to weather extremes, the primary focus is on washability and smooth finishes. Interior paints need to endure routine wear-and-tear from human activity.
- Exterior Painting: As exteriors face environmental stressors like rain or intense sunlight, exterior paints prioritize long-term protection over aesthetics.
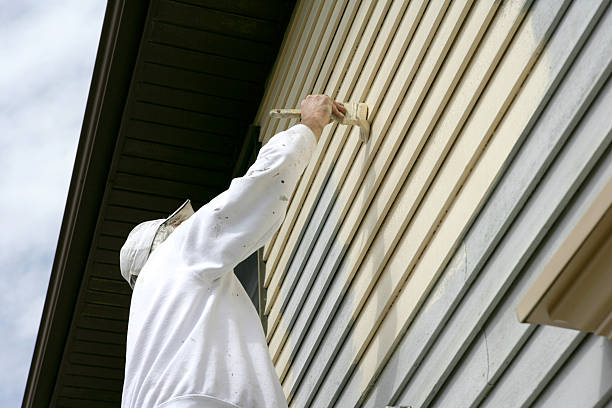
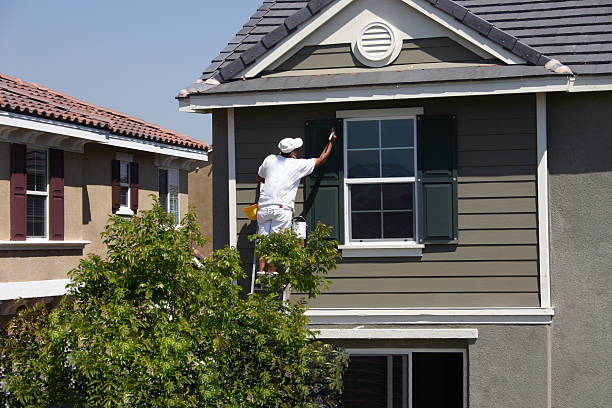
3. Application Techniques
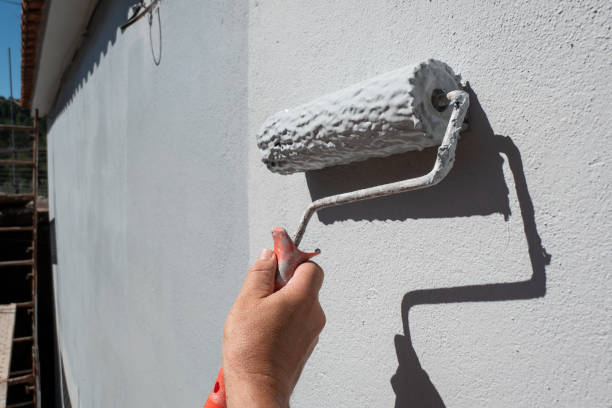
The painting process also varies based on location: – Interior Surfaces: Usually painted with rollers or brushes for detailed finishes. The focus here is on achieving even coverage with minimal mess. – Exterior Surfaces: Larger tools like sprayers are often employed for quicker application since these areas tend to be expansive.
4. Color Fading Concerns
Due to constant exposure to sunlight: – Exterior paints use pigments with higher UV resistance. – Interior colors typically maintain their vibrancy longer since they avoid direct sunlight exposure.
5. Cost Variations
The cost per gallon may differ based on composition: – Exterior paint generally costs more due to its specialized additives ensuring durability. – Interior paint is relatively budget-friendly but might involve added costs for features like low-VOC formulations.
6. Safety Considerations
Safety measures vary depending on whether you’re working indoors or outdoors: – Indoor environments require proper ventilation during painting to minimize VOC inhalation risks. – Outdoor projects present different challenges such as protection against wind-borne debris landing on wet surfaces or sudden weather changes.
Summary Table: Key Differences
| Aspect | Interior Painting | Exterior Painting |
| Environment | Controlled | Exposed |
| Focus | Aesthetics & easy maintenance | Durability & weather-resistance |
| Tools Used | Brushes/Rollers | Sprayers/Heavy-duty rollers |
| Durability | Moderate | High |
| Cost | Affordable | Generally higher |
Understanding these distinctions ensures that you choose the right products and methods tailored specifically for your project needs. Proper planning will ultimately lead to a longer-lasting finish whether you’re transforming an indoor space or refreshing your home’s exterior facade.
Inspection and Planning with a Top Painting Company Perrysburg OH
Before you begin painting any surface, it’s crucial to conduct a thorough inspection:
– Interior Surfaces: – Examine walls for cracks, dents, or nail holes. – Assess existing paint layers for peeling or bubbling. – Check for stains caused by water damage or mold. – Exterior Surfaces: – Look for signs of structural damage such as rot or warping. – Identify areas affected by weather exposure, dirt buildup, or mold growth.
Once inspection by https://www.perrysburgpainting.net is complete, create a plan that considers surface preparation needs, tools required, and environmental conditions.
Preparing Surfaces for Interior & Exterior Painting Perrysburg OH
Clean surfaces provide better adhesion and reduce issues like uneven finishes.
– Interior Cleaning:
Use a mild detergent solution to remove dust, grease, or grime from walls and ceilings. Pay special attention to kitchens where grease stains tend to accumulate around cooking areas.
– Exterior Cleaning:
Exterior surfaces often require more aggressive cleaning methods like pressure washing to remove dirt, mildew, and flaking paint caused by prolonged exposure to outdoor elements.
| Cleaning Method | Interior | Exterior |
| Dusting/Wiping | Ideal for lightly soiled walls | Ineffective due to heavy dirt |
| Mild Detergent Wash | Commonly used in homes | Limited effectiveness outdoors |
| Pressure Washing | Rarely necessary | Essential for prepping large areas |
Surface Repairs and Priming
A smooth base ensures professional results:
– Interior Repairs: Fill cracks and holes with spackle or joint compound using a putty knife; sand down rough patches after drying. For stained areas (e.g., water damage), apply a stain-blocking primer. – Exterior Repairs: Patch larger gaps with exterior-grade filler. Address wood rot with epoxy filler where needed. Always use an appropriate primer designed for exterior conditions before proceeding with paint.
Priming Tips:
– Use water-based primers for drywall indoors. – For metal exteriors prone to rusting (e.g., gutters), choose oil-based primers that offer added protection.
Choosing Paints Suitable for Each Surface
The type of paint used significantly impacts both aesthetics and durability: – Interior Paints: Look for low-VOC (Volatile Organic Compounds) paints that are safer indoors. Matte finishes work well in living rooms; semi-gloss is ideal in high-moisture areas like bathrooms. – Exterior Paints: Opt for weather-resistant paints formulated specifically against UV radiation, rain exposure, or temperature fluctuations.
| Feature | Interior Paints | Exterior Paints |
| Durability | Less exposed but designed for wear | Highly durable against weather |
| Finish Options | Multiple options (matte/satin/gloss) | Limited (usually satin/semi-gloss) |
| VOC Levels | Low-VOC preferred | May contain higher VOC |
Applying the Paint
A systematic approach ensures even coverage: 1. Start with edges using brushes before filling larger areas with rollers. 2. Apply multiple thin coats instead of one thick coat; this reduces drips while enhancing durability. 3. Allow adequate drying time between coats—typically four hours indoors and up to six outdoors (depending on humidity).
For best results: – Use long strokes when rolling paint on large surfaces. – Avoid painting exterior surfaces during extreme temperatures or high winds as they can compromise adhesion.
Final Touches
After application: 1. Remove painter’s tape carefully while the paint is still tacky to prevent peeling edges. 2. Inspect thoroughly under different lighting conditions to address any missed spots.
By following these steps meticulously, you can achieve professional-grade results that stand the test of time—whether refreshing your home’s interiors or rejuvenating its exteriors.
The Purpose and Application of Different Types of Paints
Paint plays a vital role in both aesthetics and protection, but not all paints are created equal. Understanding the purpose and application of different types of paints can help you choose the right product for your specific project. Below is an exploration of various paint types, their features, and how they are best used.
1. Types of Paints by Base
Water-Based Paints (Latex):
– Purpose: Ideal for most interior walls and ceilings due to their ease of use and quick drying time.
– Benefits:
– Low odor
– Easy cleanup with water
– Resistant to cracking over time
– Applications: Living rooms, bedrooms, kitchens, bathrooms
Oil-Based Paints (Alkyd):
– Purpose: Preferred for surfaces that require durability or a smoother finish. Often used on trim, doors, cabinets, or exterior features.
– Benefits:
– Harder finish for enhanced durability
– Stain-resistant properties
– High gloss retention over time
– Applications: Baseboards, window frames, outdoor furniture
2. Specialty Paints and Their Uses
| Type | Purpose | Best Used On | Features |
| Primer | Prepares surfaces by sealing pores and improving paint adherence | Walls, woodwork, metal | Provides a uniform base |
| Enamel Paint | Durable finish that resists wear | Metal surfaces like railings | Resistant to stains & discoloration |
| Acrylic Paint | High versatility; offers vibrant color options | Interior/Exterior walls | UV-resistant & weatherproof |
| Anti-Mold Paint | Prevent moisture-related mold issues | Bathrooms, basements | Contains fungicidal agents |
| Epoxy Paint | Long-lasting coating for heavy-duty floors | Garages or industrial spaces | Extremely durable & chemical-resistant |
3. Finishes: Aesthetic Appeal Meets Functionality
- Non-reflective surface ideal for hiding imperfections.
- Best suited for ceilings or low-traffic areas.
- Slight sheen that works well in living rooms or dining rooms.
- Durable with a subtle shine; commonly used in hallways and family areas.
- Reflective surface; moisture-resistant.
- Great choice for kitchens or bathrooms.
- Ultra-reflective; excellent for accents such as doors or furniture.
Tips to Choose the Right Paint Type
Here are some quick guidelines when selecting paint: 1. Match durability with usage: – High traffic areas need durable finishes like satin or semi-gloss. 2. Consider environmental factors: – For humid spaces like bathrooms, mold-resistant paint is essential. 3. Prioritize safety: – Look for low-VOC (volatile organic compound) options to reduce harmful emissions indoors.
Understanding paint purposes ensures not only better results aesthetically but also long-term performance tailored to the needs of your project.
Essential Surface Preparations Needed for a Perfect Paint Job
Proper surface preparation is one of the most critical steps in achieving a flawless and long-lasting paint job. Skipping or rushing this step often leads to uneven finishes, poor paint adhesion, or premature peeling. Below, we outline the essential preparations required for different surfaces to ensure optimal results.
Assessing the Surface Condition
- Cracks and Holes: Look for cracks, holes, dents, or other imperfections that need filling.
- Dirt and Grime: Check for accumulated grease, dirt, or mildew that could interfere with adhesion.
- Old Paint Layers: Identify peeling or flaking paint that needs removal.
- Moisture Levels: Ensure the surface is dry to prevent moisture-related issues like bubbling or blistering.
Cleaning the Surface
- Use a damp cloth with mild detergent to remove dust and stains from walls.
- For kitchens and bathrooms, degrease areas exposed to cooking residues or steam.
- Pressure wash siding, masonry, or other exterior materials to remove dirt and mold.
- Scrub stubborn stains with a stiff-bristle brush if necessary.
Repairing Damaged Areas
- Fill cracks and holes using appropriate materials such as spackling paste for drywall interiors or exterior-grade fillers for outdoor projects.
- Sand down rough patches after filling to ensure a seamless surface transition.
- Address water damage by applying specialty primers that block stains from seeping through new paint layers.
| Surface Type | Repair Tool/Material Needed |
| Drywall (Interior) | Spackle + Sandpaper |
| Wood (Interior/Exterior) | Wood Putty + Fine-Grit Sandpaper |
| Concrete or Masonry | Epoxy Filler |
Sanding for Smoothness
- Medium Grit (120–150): Ideal for smoothing filler patches.
- Fine Grit (180–220): Recommended for creating smooth finishes before applying primer.
Pro Tip: Always sand in circular motions and clean off sanding dust using a lint-free cloth before moving forward.
Priming the Surface
- Ideal for covering water damage stains or smoke marks.
- Recommended when painting over glossy finishes such as oil-based paints.
- Designed for outdoor applications where surfaces face extreme weather conditions.
Ensure even primer application in thin layers and allow adequate drying time based on manufacturer instructions before proceeding with paint application.
Additional Tips for Perfect Preparation
- Remove hardware like outlet covers and door handles before painting to avoid splatter marks.
- Mask trim edges and protect floors using painter’s tape along with drop cloths.
- Maintain consistent ambient conditions—paint adheres best at recommended temperature ranges provided by manufacturers.
Proper preparation ensures not only aesthetic appeal but also maximizes durability over time—a key step in any professional-quality painting project!
Essential Surface Preparations Needed for a Perfect Paint Job
Proper surface preparation is critical to achieving a flawless and long-lasting paint finish. Whether you’re tackling an interior or exterior painting project, taking the right steps to prepare the surface ensures better adhesion of paint, improves durability, and enhances the overall aesthetics. Below are essential surface preparation techniques that can help you achieve professional results.
1. Cleaning the Surface Thoroughly
Before starting any painting project, it’s vital to clean the surface to remove dirt, grease, mildew, or other contaminants that could prevent paint from adhering properly.
- For walls: Use a mild detergent mixed with water and a sponge or cloth to wipe down walls.
- For exteriors: Pressure washing is often recommended to remove grime, mold, and peeling paint.
- For wood surfaces: Sand lightly and clean with a damp cloth to eliminate dust.
2. Repairing Damaged Areas
Inspect the surface for any cracks, holes, dents, or chips that need repairing before applying paint. Neglecting this step can lead to uneven surfaces and diminish the quality of your work.
- Patch small holes using spackling paste or filler.
- Use joint compound for cracks in drywall.
- Replace damaged wood sections if necessary for exterior surfaces.
Let repairs dry completely before moving forward.
3. Sanding for Smoothness
Sanding is essential for leveling out rough areas and providing a smooth base for painting. It also helps improve paint adhesion by creating texture on glossy surfaces.
Recommended tools: | Type of Surface | Tool Needed | Grit Level | |————————–|————————-|————————–| | Drywall | Sanding sponge/paper | Medium (120–150) | | Wood | Orbital sander/sandpaper| Fine (180–220) | | Metal | Sandpaper/steel wool | Medium-fine (150–180) |
Always clean away sanding dust with a tack cloth or vacuum after sanding is complete.
4. Priming the Surface
- Oil-based primer: Ideal for covering stains or sealing wood grains.
- Latex primer: Appropriate for drywall or masonry.
- Bonding primer: Best used on glossy surfaces like tiles or laminates.
Apply one coat of primer evenly across the entire surface and allow it to dry thoroughly before adding paint layers.
5. Masking Off Areas
- Use painter’s tape along edges of trim, windowsills, baseboards, and other areas where different colors meet.
- Cover floors with drop cloths or plastic sheeting to protect against drips.
- Remove hardware such as switch plates or light fixtures wherever possible; otherwise tape over them securely.
Common Mistakes During Surface Preparation
- Skipping cleaning steps – Painting over dirt leads to peeling paint over time.
- Failing to repair imperfections – Unprepared cracks will remain visible after painting.
- Forgetting primer – Without priming porous surfaces like bare wood/drywall may soak up extra coats of paint unnecessarily.
- Not sanding glossy finishes – Paint won’t bond effectively without etching slick surfaces first.
By following these essential steps with precision and care, you can ensure that your next painting project delivers superior results every time while minimizing rework down the line. Proper preparation not only saves time but also enhances durability!
Must-Have Tools Used in Professional Painting Projects
When undertaking a professional painting project, having the right tools is just as crucial as selecting the appropriate paint. The correct tools not only improve efficiency but also ensure a flawless, high-quality finish. Below is a detailed guide to the must-have tools for professional painting projects, categorized by their purpose.
Surface Preparation Tools
- Sandpaper and Sanding Blocks: For smoothing surfaces and removing old paint or imperfections.
- Putty Knife/Spatula: Used to fill cracks or holes with spackle or putty.
- Wire Brush: Ideal for removing flaking or peeling paint from surfaces.
- Painter’s Tape: Essential for masking off areas that should not be painted, such as trim or windows.
- Drop Cloths and Plastic Sheeting: Protect floors, furniture, and other surrounding areas from paint splatters.
Application Tools
- Angled Brushes: Best for cutting in around edges, corners, and trim work.
- Flat Brushes: Suitable for broad surfaces where precision isn’t required.
- Standard Rollers: Efficient for covering large flat surfaces like walls and ceilings.
- Mini Rollers: Ideal for smaller spaces such as cabinets or tight corners.
- Specialty Roller Covers: Available in different textures (e.g., foam, microfiber) to match surface types.
- Paint Sprayers: Often used by professionals for large-scale projects requiring a smooth finish without brush marks (e.g., fences or exterior siding).
- Paint Tray with Liners: Holds paint during roller applications while reducing cleanup time.
Measuring and Mixing Tools
- Measuring Tape: Helps calculate wall dimensions to estimate needed paint quantities.
- Paint Mixer/Paddle Attachment: Attaches to a drill for thorough mixing of paints or primers, ensuring uniformity.
Safety Equipment
- Gloves: Protect skin from chemicals found in paints and solvents.
- Safety Goggles: Shield eyes from splashes during painting or sanding.
- Respirator Mask: Filters out harmful fumes when working with oil-based paints or sprays.
- Ladders/Scaffolding: Provides access to higher areas safely; select one appropriate for your project’s height requirements.
Cleanup Tools
- Brush Comb/Spinner Tool: Cleans bristles thoroughly post-use to extend brush life.
- Bucket with Warm Water (or Solvent): Used for cleaning brushes and rollers based on whether water-based or oil-based paint was used.
- Scraper Tool/Blade Cleaner: Removes dried bits of paint on palettes or flat surfaces.
Quick Comparison Table of Essential Painting Tools
| Category | Examples | Purpose |
| Surface Preparation | Sandpaper, Putty Knife | Smooths surfaces; repairs imperfections |
| Application | Paint Brushes, Rollers | Applies paint evenly |
| Measuring & Mixing | Measuring Tape, Paint Mixer | Ensures accuracy & consistency |
| Safety Equipment | Gloves, Respirator Mask | Protects health during painting tasks |
| Cleanup | Brush Comb, Solvent Buckets | Maintains tool longevity |
By investing in these essential tools upfront, both DIY enthusiasts and professionals can achieve efficient workflows while delivering exceptional results. Proper care of these tools will also ensure they remain a valuable part of your toolkit over time.
Common Challenges Encountered During Painting and How to Overcome Them
Painting can transform a space or object, but the process often comes with a variety of challenges. Understanding these challenges and applying effective solutions can ensure a smoother painting experience with professional results. Below are some common issues faced during painting projects and how to address them.
Uneven Paint Coverage
Uneven paint coverage is one of the most common challenges, especially when using lighter colors over darker walls or vice versa. This can result in sections looking patchy or streaky.
How to Overcome It:
– Use Primer: Applying a primer before painting helps create a uniform base for better paint adhesion and consistent color coverage.
– Use Quality Paint: Invest in high-quality paints that offer better pigment density and coverage.
– Apply Multiple Coats: For darker surfaces or less-pigmented paints, apply at least two coats for even results.
Paint Drips and Runs
Drips and runs occur when too much paint is applied to the surface or when rollers/brushes are overloaded with paint. These imperfections can ruin the finish of your project.
How to Overcome It:
– Check Paint Consistency: Avoid using overly thick paint or diluting it excessively. Follow manufacturer guidelines for thinning if needed.
– Use Proper Tools: Use high-quality brushes and rollers suited for your specific paint type and surface area.
– Apply Thin Coats: Work in thin, even layers rather than attempting to cover everything in one heavy coat.
Cracking or Peeling Paint
This issue typically arises due to poor surface preparation, moisture problems, or using incompatible paint types on certain surfaces.
How to Overcome It:
– Prepare Surfaces Thoroughly: Remove old peeling paint, sand rough areas, and clean surfaces of dirt and grease before starting your project. – Address Moisture Issues: Identify potential sources of moisture (e.g., leaks) that could cause peeling over time. – Choose Compatible Paints: Ensure primers, undercoats, and topcoats are compatible with each other as well as the substrate material.
Streak Marks from Brushes or Rollers
Visible streaks occur due to improper application techniques, low-quality tools, or insufficient blending between strokes.
How to Overcome It: – Maintain a Wet Edge: Always work quickly enough that you blend wet sections before they start drying. – Use Professional Tools: High-quality synthetic brushes or microfiber rollers reduce the likelihood of visible streaks. – Follow Application Techniques Carefully: Use long, smooth strokes for brushes and consistent pressure while rolling.
Uneven Drying Times
Uneven drying times may cause areas of sheen variation across painted surfaces.
How to Overcome It: – Control Environmental Conditions: – Maintain consistent room temperature (ideally 50–85°F). – Avoid painting during high humidity levels. – Ensure proper air circulation without direct drafts hitting freshly painted walls. – Stir Thoroughly Before Use: Ensure the paint is properly mixed so pigments are evenly distributed.
Table: Quick Reference Solutions for Painting Challenges
| Challenge | Cause | Solution |
| Uneven coverage | Skipping primer | Apply primer; use quality paints |
| Drips/runs | Excessive paint on tools | Apply thin layers; avoid overloading |
| Peeling/cracking | Poor prep/moisture issues | Prepare surface; resolve moisture |
| Streak marks | Low-quality tools/techniques | Use pro tools; keep a wet edge |
| Uneven drying | Environmental inconsistency | Control temp/humidity; stir thoroughly |
By anticipating these challenges in advance and implementing proactive strategies, you can achieve durable finishes that enhance both aesthetics and functionality across various painting projects.
- Key Differences Between Interior and Exterior Painting by Painters Perrysburg OH Explained in Detail
- Tips for Choosing the Right Paint for House Painting Perrysburg OH Inside and Out
- Signs Your Home in Perrysburg OH Needs House Painting
- Painters Perrysburg OH – Everything You Need to Know About Residential Painting
- Comprehensive Guide and Tips from Professional Painters Perrysburg OH
- Factors Influencing Repainting Frequency
- Key Differences Between Interior and Exterior Paint for House Painting Perrysburg OH